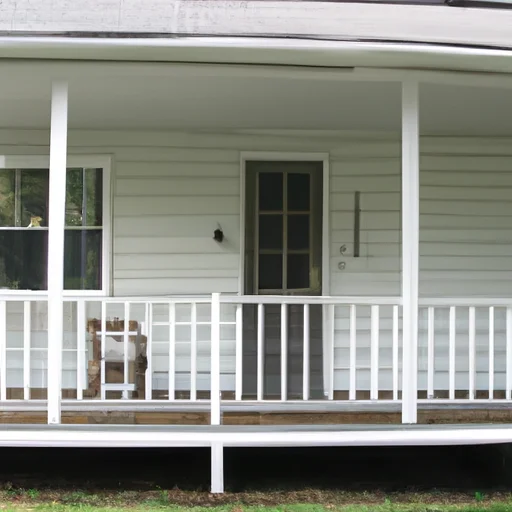
Hey there! Have you ever thought about painting your porch? Well, if you’re looking to spruce up your outdoor space and give it a fresh new look, painting your porch can be a fantastic idea! It’s a project that can add instant curb appeal to your home and make your porch a welcoming place to relax and enjoy the outdoors. In our upcoming article, we’ll share some tips and tricks on how to paint a porch efficiently and achieve professional-looking results. From choosing the right paint color to prepping the surface and applying the paint, we’ve got you covered. So, stay tuned to learn more about painting a porch!
Introduction to Painting A Porch
Are you ready to transform your porch? In our article, we’ll dive into all the details you need to know to successfully paint your porch. We’ll discuss the importance of proper preparation, including cleaning and repairing any existing damage. We’ll also guide you through the process of selecting the perfect paint color that suits your style and complements your home’s exterior. Additionally, we’ll provide step-by-step instructions on how to apply the paint in a way that ensures a smooth and even finish. So, if you’re eager to give your porch a fresh new look, stick around for our upcoming article where we’ll share all the secrets to painting a porch like a pro!


Table of Contents
Preparation
Before you begin painting a porch, it’s important to thoroughly prepare the area. This includes cleaning the porch surface, repairing any damaged areas, and removing old paint or stain.
Cleaning the porch surface
To start, sweep or use a leaf blower to remove any dirt, debris, or leaves from the porch surface. For more thorough cleaning, you can use a pressure washer or a scrub brush with a mixture of warm water and mild detergent. Be sure to rinse the surface thoroughly and allow it to dry completely before proceeding.
Repairing any damaged areas
Next, inspect the porch for any cracks, holes, or damaged wood. Use a putty knife to remove any loose or chipped paint, and apply a wood filler or wood epoxy to fill in any gaps or cracks. Once the filler has dried, sand the area smooth with sandpaper or a sander.
Removing old paint or stain
If your porch has old paint or stain that is peeling or flaking, it’s important to remove it before applying new paint. This can be done using a scraper or a heat gun, being careful not to damage the wood surface of the porch. After removing the old paint or stain, sand the area to create a smooth surface for the new paint or stain.
Choosing the Paint
When choosing the right paint or stain for your porch, there are a few things to consider. These include selecting the right type of paint, considering the porch’s architecture and surroundings, and determining the desired color scheme.
Selecting the right type of paint
There are various types of paint available for porches, including latex paint, oil-based paint, and epoxy coatings. Latex paint is a popular choice for its durability, ease of application, and fast drying time. Oil-based paint offers long-lasting protection and is more resistant to cracking and peeling. Epoxy coatings provide a highly durable finish and are ideal for high-traffic areas.
Considering the porch’s architecture and surroundings
Take into account the architectural style of your porch and the surrounding environment. Consider factors such as the porch’s color scheme, the materials used, and the overall design aesthetic. For example, if you have a traditional porch with a classic color scheme, you may opt for a more subdued paint color. On the other hand, if you have a modern porch with bold architectural features, you might choose a vibrant or contrasting paint color to enhance its visual appeal.
Determining the desired color scheme
When deciding on a color scheme for your porch, think about the desired mood or atmosphere you want to create. Lighter colors can make a small porch appear larger and more inviting, while darker colors can add drama and sophistication. You can also consider using multiple colors to create visual interest or highlight specific architectural details.
Gathering the Materials
Once you have decided on the type of paint and color scheme, it’s time to gather the necessary materials. Here is a list of items you will need:
Paint brushes and rollers
Choose high-quality paint brushes and rollers that are suitable for the type of paint you are using. Brushes with synthetic bristles work well with latex paint, while natural bristle brushes are better suited for oil-based paints.
Paint trays
A paint tray will allow you to evenly distribute the paint and load your brush or roller easily.
Drop cloths
Protect your porch and surrounding areas from paint splatters by laying down drop cloths or plastic sheets.
Painter’s tape
Use painter’s tape to mask off any areas you don’t want to paint, such as windows, door frames, or trim.
Sandpaper or sander
To ensure a smooth and even paint finish, have sandpaper or a sander on hand to sand any rough or uneven areas.
Primer
Priming your porch before painting will help the paint adhere better and provide additional protection against moisture and weathering. Choose a primer that is compatible with the type of paint you are using.
Paint or stain
Finally, you will need the paint or stain of your choice. Make sure to purchase enough to cover the entire porch surface, accounting for multiple coats if necessary.


Preparing the Area
Now that you have the necessary materials, it’s time to prepare the area where you will be painting.
Covering nearby plants and furniture
Before you begin painting, move any potted plants or outdoor furniture away from the porch or cover them with drop cloths to avoid accidental paint splatters.
Laying down drop cloths or plastic sheets
To protect the surrounding area from paint drips or spills, lay down drop cloths or plastic sheets on the ground or any nearby surfaces.
Removing any obstacles or obstructions
Clear the porch of any obstructions, such as outdoor decorations or loose items, to ensure a smooth and uninterrupted painting process.
Surface Preparation
Now that the area is prepared, it’s time to prepare the porch surface itself. This involves cleaning the porch surface, sanding any rough or uneven areas, and filling cracks or gaps with putty or caulk.
Cleaning the porch surface
Before applying any paint or stain, make sure the porch surface is clean. Sweep or use a leaf blower to remove any loose dirt or debris. For a more thorough cleaning, use a pressure washer or a scrub brush with a mixture of warm water and mild detergent. Rinse the surface thoroughly and allow it to dry completely.
Sanding any rough or uneven areas
Inspect the porch surface for any rough or uneven areas. Use sandpaper or a sander to smooth out these areas, creating a level surface for the paint or stain.
Filling cracks or gaps with putty or caulk
Inspect the porch for any cracks or gaps, and use a putty knife to apply a wood filler or caulk. Smooth out the putty or caulk with a putty knife or a finger, and allow it to dry according to the manufacturer’s instructions. Sand the area smooth once the filler or caulk is dry.
Priming
Before applying the paint or stain, it’s recommended to apply a coat of primer to the porch surface. Priming helps the paint adhere better and provides an additional layer of protection against moisture and weathering.
Applying a coat of primer to the porch
Using a paintbrush or a roller, apply a coat of primer to the porch surface. Make sure to coat the entire surface evenly, working in small sections.
Following the manufacturer’s instructions
Different types of primer have different application and drying times. Be sure to read and follow the manufacturer’s instructions on the primer label for the best results.
Allowing the primer to dry thoroughly
Allow the primer to dry thoroughly before proceeding to the next step. This usually takes a few hours, but drying time may vary depending on the type of primer and environmental conditions.
Painting or Staining
Now that the porch is primed, it’s time to apply the paint or stain.
Applying the first coat of paint or stain
Using a paintbrush or a roller, apply the first coat of paint or stain to the porch surface. Start at one end and work your way towards the other, applying the paint or stain in even strokes. Make sure to coat the entire surface and achieve even coverage.
Ensuring even coverage
To achieve an even and professional-looking finish, make sure to apply the paint or stain evenly. Avoid applying too thick of a coat, as this can result in drips or an uneven appearance.
Allowing proper drying time between coats
Once the first coat of paint or stain is applied, allow it to dry completely before applying additional coats. This usually takes a few hours, but drying time may vary depending on the type of paint or stain and environmental conditions. Follow the manufacturer’s instructions for specific drying times.
Adding Extra Protection
To enhance the durability and weather resistance of your porch paint or stain, it’s recommended to apply a clear sealant or protective coating.
Applying a clear sealant or protective coating
Using a paintbrush or a roller, apply a clear sealant or protective coating to the porch surface. This will provide an additional layer of protection against moisture, UV rays, and general wear and tear.
Enhancing durability and weather resistance
A clear sealant or protective coating will help extend the life of your porch paint or stain, ensuring it remains vibrant and resistant to the elements for years to come.
Extending the life of the porch paint
Regular maintenance and upkeep, such as cleaning and reapplying a clear sealant or protective coating when needed, will help extend the life of your porch paint and maintain its overall appearance and performance.
Cleaning Up
Once you have finished painting the porch, it’s important to clean up properly.
Removing paint trays and brushes
Clean any paint trays and brushes immediately after use to prevent the paint from drying and ruining the tools. Use warm soapy water to clean latex paint, and use paint thinner or mineral spirits for oil-based paint.
Properly disposing of used materials
Dispose of any used paint cans, empty paint trays, or other painting materials according to local regulations. Be sure to follow proper disposal guidelines to protect the environment.
Cleaning up any spills or splatters
Inspect the surrounding area for any paint spills or splatters and clean them up immediately. Use a cloth or sponge dampened with warm soapy water or the recommended paint cleaner to remove any accidental paint stains.
Conclusion
By following these steps and properly preparing, priming, and painting your porch, you can transform its appearance and protect it from the elements. Enjoy your newly painted porch and make sure to regularly protect and maintain it for long-lasting beauty. For larger porch painting projects or if you prefer professional assistance, don’t hesitate to seek help from a painting contractor who specializes in outdoor painting. They have the experience and expertise to ensure a high-quality and long-lasting finish that will make your porch a welcoming and beautiful space for years to come.


